What the Heck is a Quilt: Everything you did (and didn’t) want to know about quilting

If you’re reading this, you may have fallen down the Pinterest rabbit hole and decided you really want to make a quilt. Don’t worry, you’ve landed in a safe place and I will teach you the basics of what I know. I began my first quilt in the Fall of 2020 and can tell you I’ve fallen in love with quilting. I would declare myself an advanced beginner at this point in time and have certainly discovered what works for me and what doesn’t.
What the heck is a quilt anyway?
I bet when you hear the word “quiltâ€, you imagine a scrappy looking blanket laid on a bed. That’s a quilt! Keep in mind, many other things can be “quilted†as well, for example jackets, pillowcases, pincushions etc.
Generally, a quilt is made of three layers: the quilt top, the batting and the backing. These layers get sandwiched and “quilted†together. Quilting is the act of securing the layers to each other with stitches. The quilt then gets bound (more on this later) and becomes a functioning, beloved quilt.
A quilt top can be a panel/solid piece of fabric, several pieces of fabric or patchwork. Patchwork typically I cover taking many pieces of fabric and sewing them into larger squares called blocks. All of these blocks get sewn together to create one solid sheet of fabric.
The batting is the centre of the quilt that you do not see. It is usually made from cotton, wool, polyester or a combination of these fabrics. This is what provides warmth and gives quilts that plush look between quilting lines; that little bit of “puffâ€, if you will. This layer is sandwiched between the quilt top and the backing.
The backing is exactly that- the back of a quilt! One large piece of fabric to finish your quilt sandwich off. You *can* piece your backing the same way as a quilt top, or sew larger pieces of fabric together but it is preferred to use one solid piece. This will help the quilt last longer over time.
These three layers are then laid one on top of the other and secured in place using pins, clips,safety pins or even adhesive spray. This is when the quilting happens! To secure these layers together you can hand sew, hand tie, machine quilt or free motion quilt the layers.
Once the quilt pieces are secure, the process of binding happens. Long strips of fabric, often around 2.5†wide, are sewn onto the front and back of the quilt to secure the raw edges. This is done by hand, machine or a combination of both.
The History of Quilting
Quilting has a beautiful and diverse history. From reusing and repurposing what you’ve already got, to marking joyous occasions and providing social interaction. From my own research *read: Google deep dive* it seems we have evidence of quilts as early as the medieval period (1300’s) from all over the world. Often, quilts were pieced together from bits of old clothing that could no longer be worn or off cuts and scraps of fabric that would otherwise be wasted. Did you know Jane Austen used to quilt? Letters she wrote to her brother have been recovered asking him to collect scraps of fabrics he found on his travels for the quilts he and their sister were working on together. The resulting quilt still exists, and has been preserved and put on display. There was also a Riley Blake fabric line designed which recreated some of the patterns found in the quilt.
I’ve always been attracted to quilts and quilt making primarily, I think, because of their rich history. I love old things. Old homes and churches and furniture and books. I love to imagine the lives of the people that came before me and how they experienced these things and places. Quilts that are passed down through families are called Heirloom Quilts and are often beloved keepsakes and memories of loved ones no longer with us. Older quilts, for example the ones on display in museums, can offer a glimpse into what life was like for the person/s who made it.
If you’d like to learn a bit more about the very extensive history of quilting, the Victoria and Albert Museum in London, England has a great piece about it here.
Where should I start?

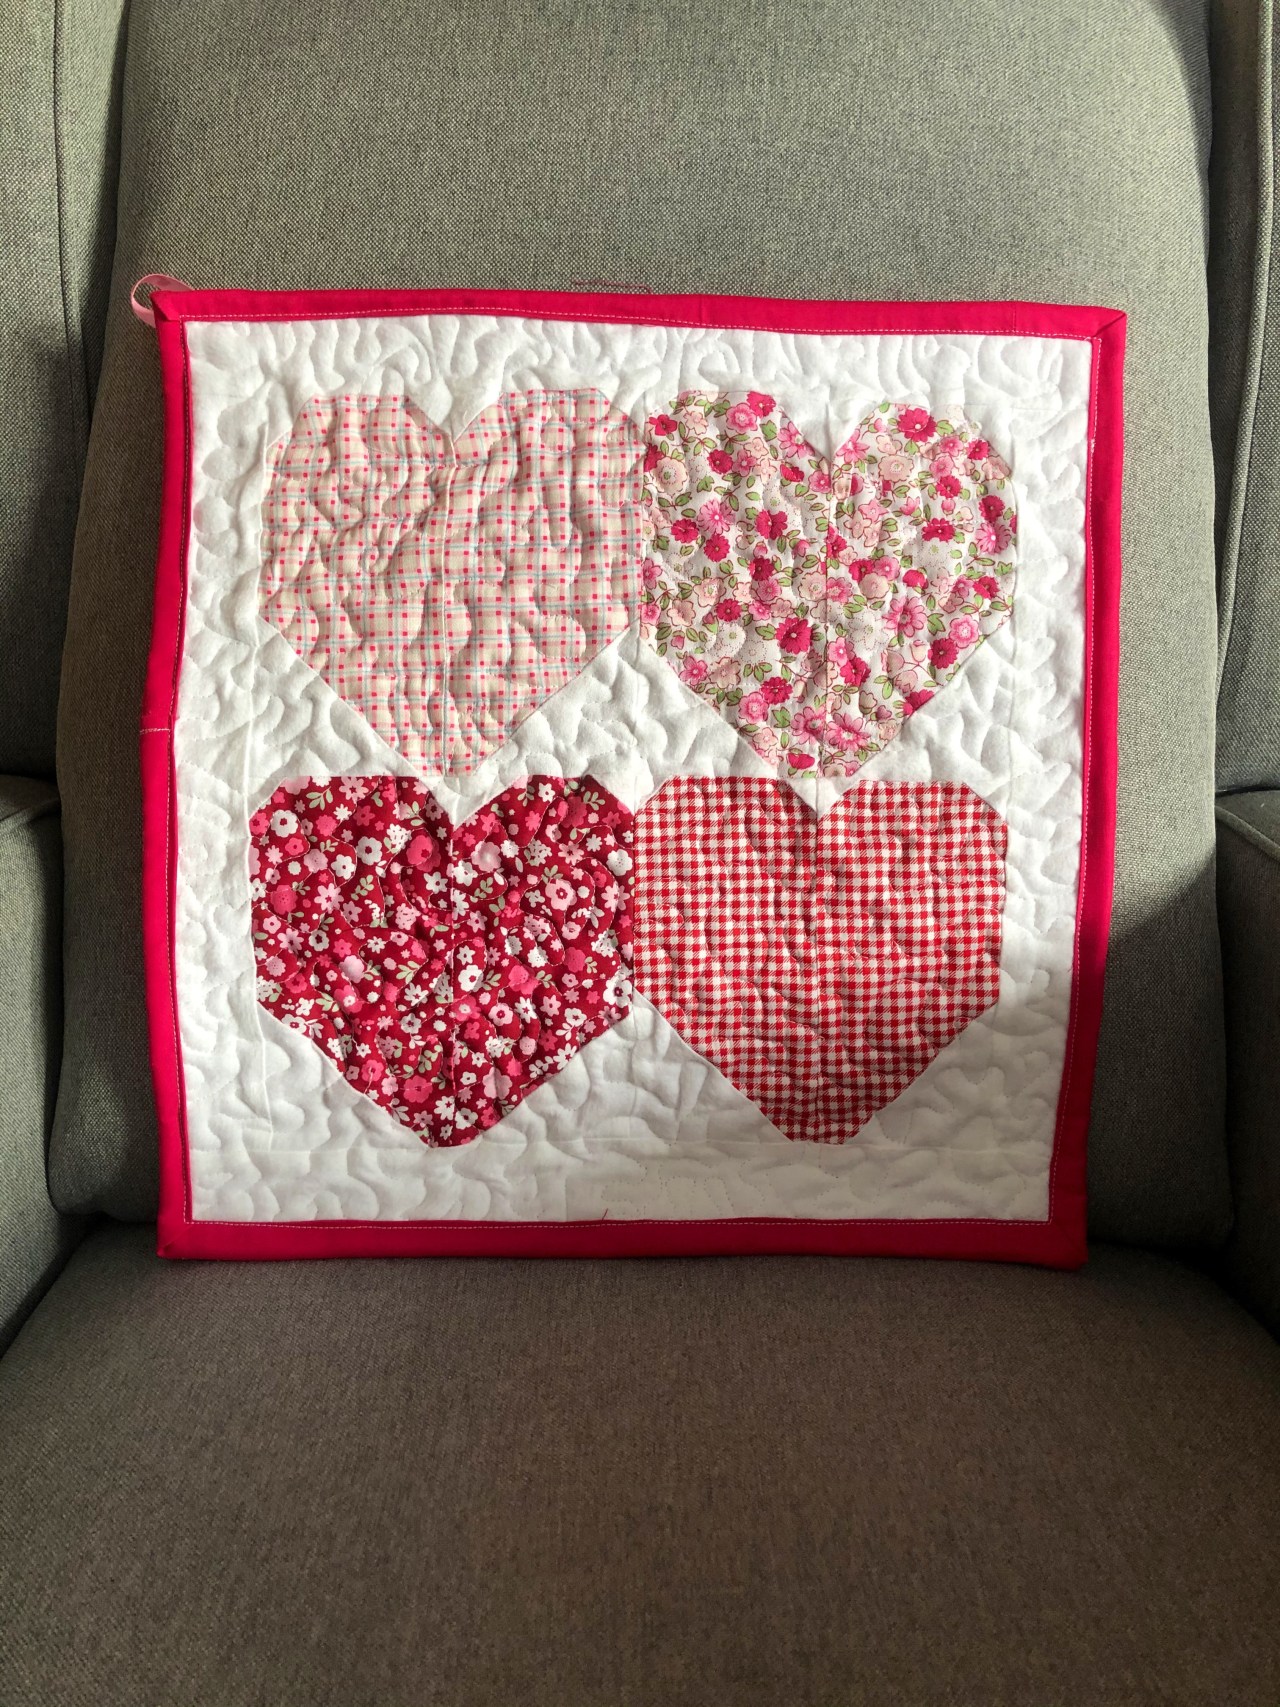
I recommend starting small, really small, with a quilted wall hanging or placemat for example. Buy just enough fabric, or pull out your scraps (everyone else has a big bucket of scraps right?). You can totally make a small project to dip your toes into quilting with a few fat quarters, too. Just in case quilting isn’t for you, you don’t want to invest tons of money into it at first. For my first quilting project, pictured above, I used:
- 1 fat quarter for the backing plus extra for binding
- Scrap flannel
- inexpensive polyester crib-sized batting
- Pins or binding clips
- Pre-cut 10†fabric squares
- Thread and sewing machine
- the free motion quilting foot that came with my machine (you can straight stitch if you’d like as well)
I pieced 4 of the same block, joined them together, added a border of scrap flannel and quilted it! A great first project.
So, pull out a sewing book or find a free quilt block online that you like and give it a try! If you want to check out some of my fabric designs, pop over to my Spoonflower Shop. xoxo Sades
Disclaimer: This post contains some affiliate links. This creates no extra cost for you, but provides me with a small commission if a sale is made. I never suggest products I wouldn’t use myself.


